
Elegance
Date
August 06, 2026
Tags
You can have an incredible voice, a beautiful song, and perfect pitch—but if your video looks poorly lit or the camera angle is unflattering, many people will scroll away before they even hear your performance.
Visual presentation matters on social media.
Especially on platforms like Instagram and TikTok, people decide within the first second whether they're going to keep watching.
Fortunately, you don't need an expensive camera or a professional studio.
A few simple adjustments to your camera angle and lighting can dramatically improve your singing videos.
People hear your voice—but they decide whether to stay with their eyes first.
Keep the Camera Around Eye Level
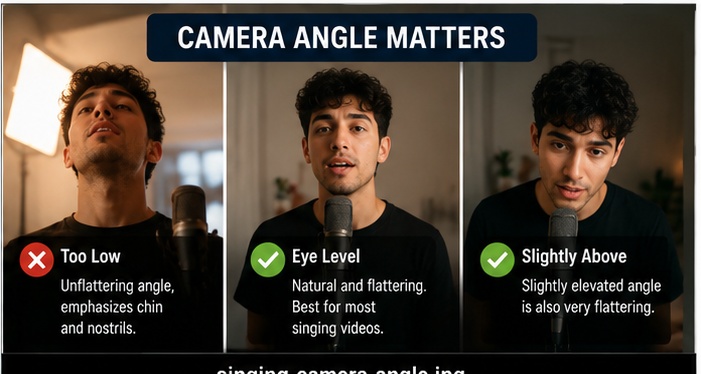
One of the biggest mistakes beginners make is placing the camera too low.
Shooting upward emphasizes your chin, nostrils, and neck while making your face appear less flattering.
Instead, position the camera approximately at eye level or slightly above.
This creates a more natural perspective and usually makes facial expressions easier to see.
Since facial emotion is an important part of singing, this small change can make a big difference.
Use Soft Light Instead of Harsh Light
Lighting changes the entire mood of your video.
Harsh overhead lights often create deep shadows under your eyes and make your face appear tired.
Soft lighting is usually much more flattering.
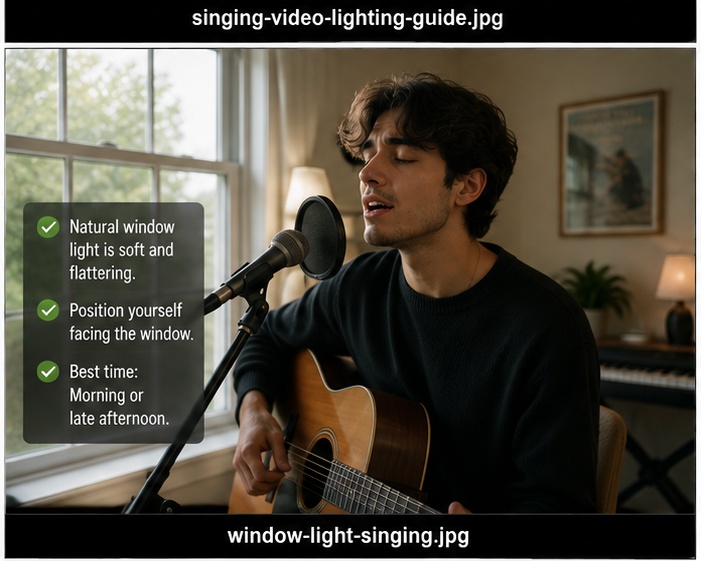
Natural daylight from a window is one of the easiest and best lighting sources available.
If you're recording at night, a soft LED light or diffused ring light can create a similar effect.
Face the Light
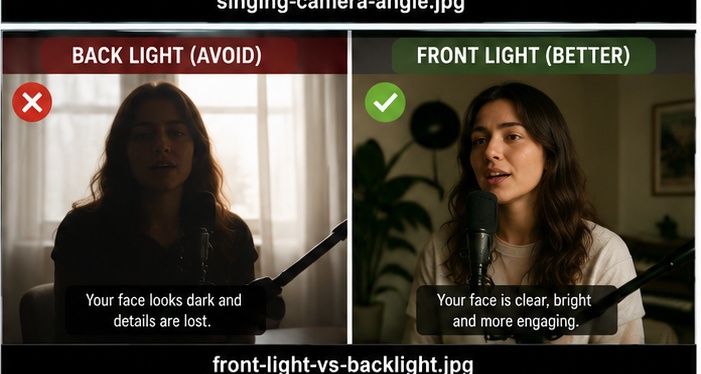
The light should generally be in front of you rather than behind you.
If a bright window is behind you, your camera may expose for the background, making your face appear dark.
Turning around so the window lights your face usually produces a much cleaner image.
Good lighting helps viewers connect with your facial expressions and emotions.
Leave Some Space Around Yourself
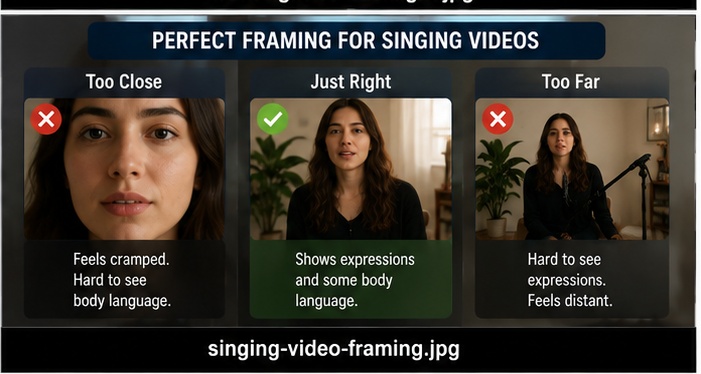
Don't place the camera so close that your face fills the entire screen.
At the same time, don't stand so far away that viewers can't see your expressions.
A medium shot—from roughly the chest upward—is one of the most popular framing choices for singing videos.
It allows people to see both your facial expression and some body language.
Your face communicates the emotion. Your voice delivers it.
Keep the Background Simple
A cluttered background competes with your performance.
Viewers should naturally focus on you, not everything happening behind you.
A clean wall, studio setup, curtain, or softly blurred room usually works well.
If there are distracting objects behind you, remove them before recording.
Look Into the Lens
It's tempting to watch yourself on the screen while recording.
However, looking directly into the camera lens often creates a stronger connection with viewers.
Imagine you're singing to one person instead of thousands.
That mindset usually makes performances feel more authentic.
Use Stable Camera Movement
Unless you're intentionally creating a dynamic music video, avoid shaky footage.
A tripod or stable phone mount instantly makes your videos appear more professional.
Smooth, stable footage helps viewers focus on your performance instead of distracting camera movement.
Experiment With Angles
Although eye-level is a great starting point, don't be afraid to experiment.
A slight side angle, a closer crop during emotional moments, or a wider shot during instrumental sections can add visual variety.
Just make sure the angle supports the performance instead of distracting from it.
Good lighting and camera angles don't replace talent—they help people notice it.
Final Thoughts
Creating beautiful singing videos doesn't require expensive equipment.
Eye-level framing, soft front lighting, a clean background, stable camera placement, and authentic facial expressions can make a huge difference.
Spend a few extra minutes setting up your shot before recording.
Your audience will notice the improvement—even if they can't explain why your videos suddenly feel more professional.
Add Review
Your email address will not be published









Comments